# Manage automations (/automations/manage)
Related: [Create a custom automation](/automations/create.md), [Integrations for the agent and automations](/automations/integrations.md), [Predefined automations](/automations/reference.md)
## Prerequisites [#prerequisites]
* A Mintlify project connected to a GitHub or GitLab repository
* For GitHub: the [Mintlify GitHub App](/deploy/github) installed on every repository you plan to use in the automation
* For GitLab: a connected GitLab account (see [GitLab setup](#gitlab-setup) below)
You can also create, list, and delete automations from the terminal with [`mint automations`](/cli/commands#mint-automations). The CLI is useful for scripting and CI. The dashboard is the easiest way to configure and monitor automation runs.
## Enable an automation [#enable-an-automation]
1. Open the [Automations](https://app.mintlify.com/products/automations) page in your dashboard.
2. Click the toggle beside an automation to enable it.
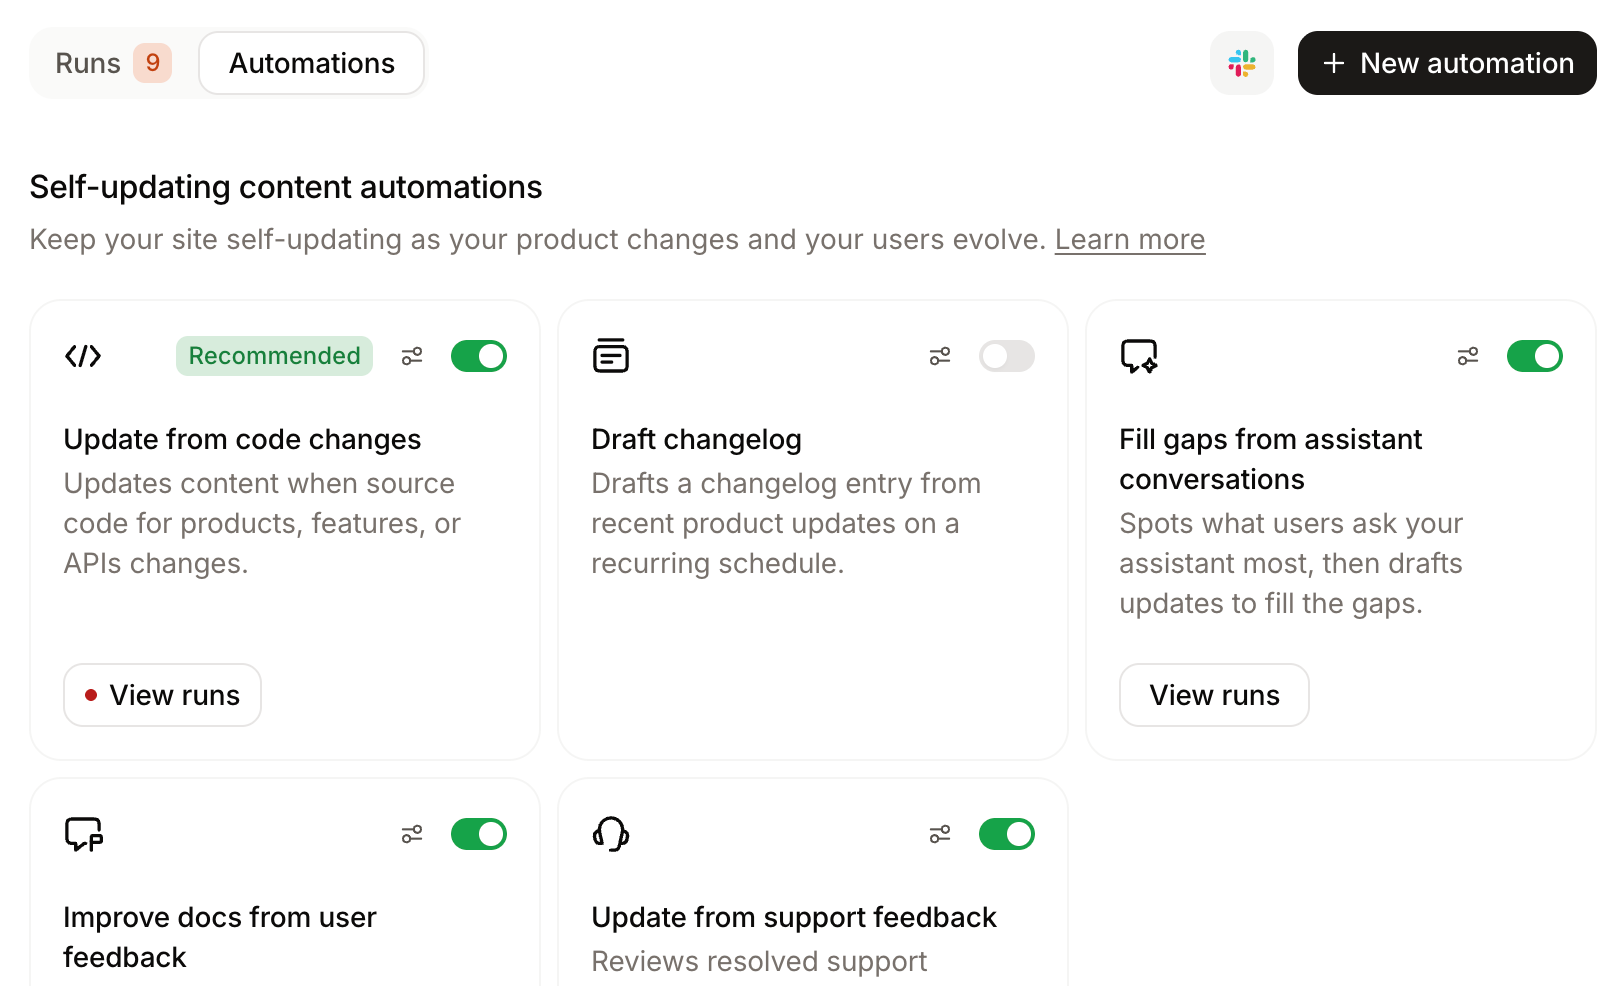
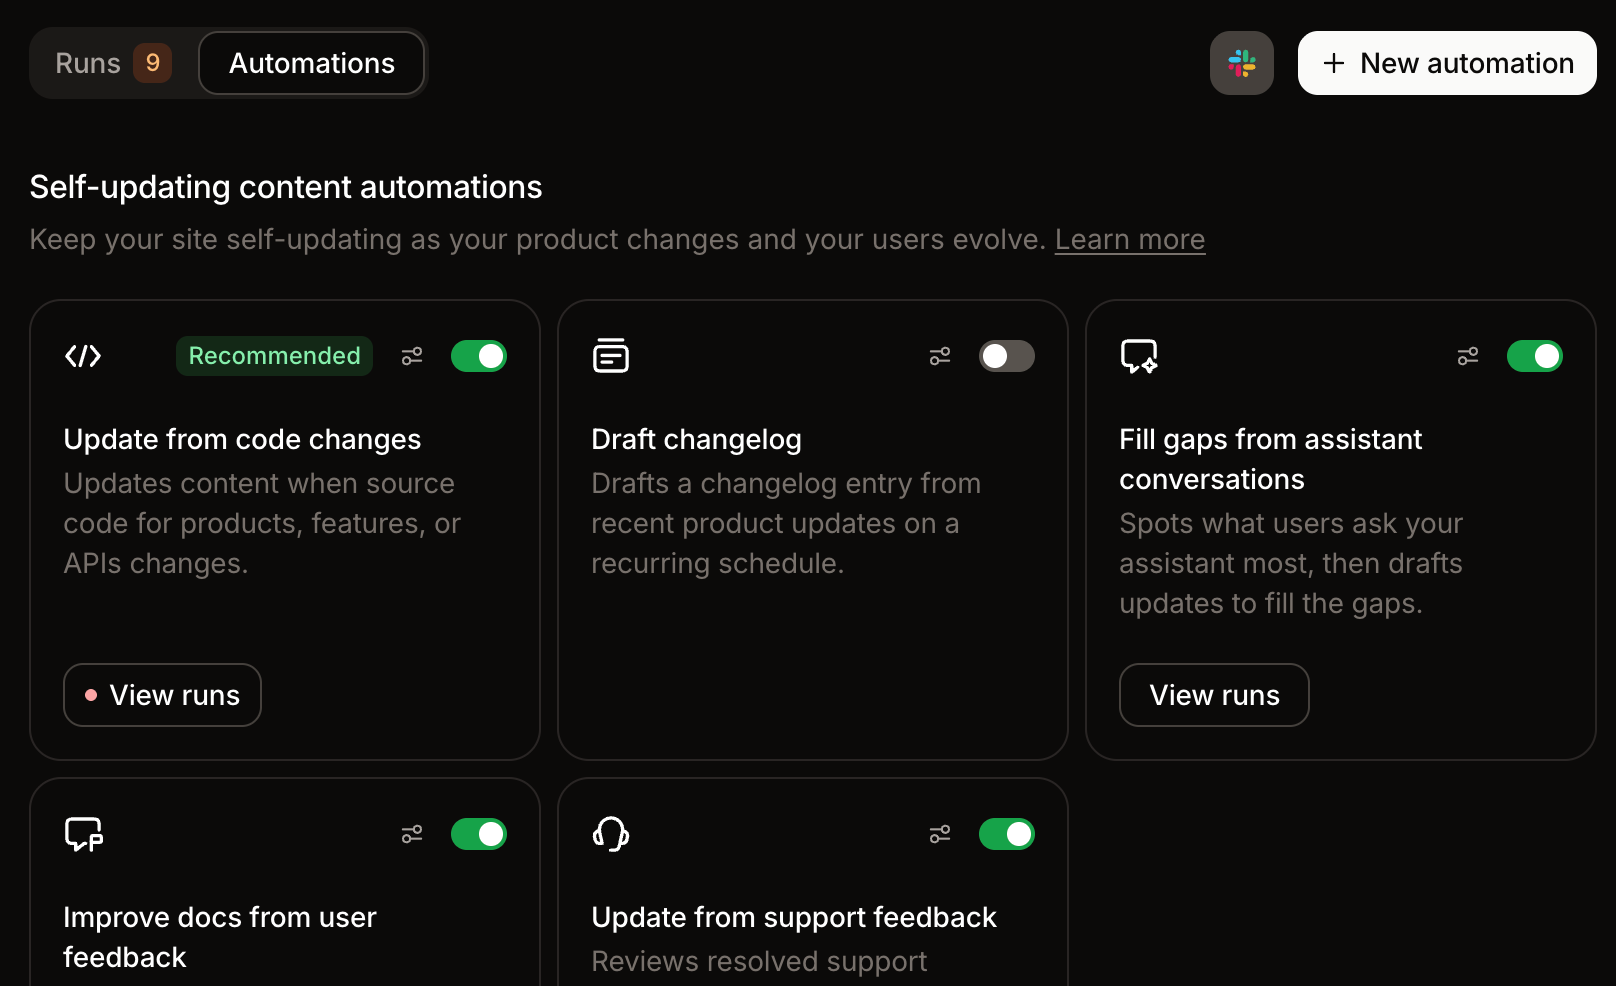 If the automation can run with default settings, it activates immediately. Otherwise, the automation's configure page opens so you can fill in any required configurations.
3. If the configure page opens, fill in the required fields and click **Save**.
To change settings for an active automation, click the settings button on its card to open its configure page. Use the toggle in the page header to enable or disable the automation, and click **Save** to apply your changes.
## Configurations [#configurations]
Each automation's configure page groups settings into **Trigger**, **Scope**, and **Advanced options** sections.
### Trigger [#trigger]
Each automation has a default trigger that controls when it runs. To change the trigger, select a different trigger type on the automation's configure page.
* **Content update**: Runs whenever you push content to your project repository, including pull request merges and direct pushes.
* **Code change**: Runs when a pull request merges in a connected source code repository. You must specify at least one source repository. Click **Add repo** to trigger on pull requests from more than one repository. For each repository, you can optionally set **Exclude author** to ignore pull requests from a specific author, and **Listening to changes in** to only trigger on pull requests with changes under a specific path.
* **Custom schedule**: Runs on a recurring schedule you define. Pick a preset (Daily, Every Monday, Every Friday, or Twice weekly) and a start hour, or select **Custom cron** and enter a standard 5-field cron expression (`minute hour day month weekday`). Automations queue within 10 minutes of the scheduled time.
* **Integration**: Runs when a selected event occurs in a connected shared integration or when a new message posts to a selected Slack channel. Available for custom automations. Select the integration and event, then complete any additional event fields that appear. For Slack triggers, pick one or more channels that you have added the [Mintlify Slack app](/agent/slack) to.
* **Webhook**: Runs when an authenticated `POST` request hits the automation's webhook endpoint. Available for custom automations only. Save the automation first; the trigger card then shows the webhook URL and a **Copy auth header** action for the `Authorization: Bearer ` header. Supply an unexpired organization API key with write access from the [API keys](https://app.mintlify.com/settings/organization/api-keys) page. Use this to trigger a run from a CI/CD pipeline, release script, or internal tool. See [Trigger automation webhook](/api/automations/webhook) for the endpoint and rate limits.
#### Filter code change triggers [#filter-code-change-triggers]
For automations with a **Code change** trigger on GitHub, each source repository appears in its own card on the configure page. You can add up to 50 repositories per automation. Under **Show advanced options** on each card, you can narrow when the automation runs for that repository:
* **Listening to changes in**: Add paths that the pull request must touch for the automation to run. Paths can be files, folders, or glob patterns (for example, `docs/**/*.mdx`). Suggestions come from the repository's tracked files. You can also type a custom path.
* **Excluding PRs from**: Add GitHub usernames or bot accounts whose pull requests should not trigger the automation. Useful for skipping merges from automation accounts. Suggestions come from recent contributors. You can also type a username.
Each repository supports up to 20 paths and 20 excluded authors. Changing the repository for an automation clears its filters.
### Update mode [#update-mode]
Each automation has a default mode for how it makes updates: either directly merging changes into your content repository, or opening a pull request for review.
Select the mode in the **After automation runs** section of the automation's configure page. Select **Update and merge changes** to merge changes automatically. Select **Modify and wait for review** to require a review before changes go live.
For GitHub repositories, automatic updates require the Mintlify GitHub App to have bypass permissions on every ruleset targeting your deploy branch, including organization-level and repository-level rulesets. See [Configure automerge](/guides/configure-automerge) for setup instructions.
For GitLab repositories, automerge uses the GitLab OAuth connection and requires at least the Maintainer role on each project.
### Context repositories [#context-repositories]
For custom automations and some predefined automations, you can add context repositories. Context repositories are additional source code repositories the agent reads when the automation runs. This is useful when your automation prompt references code, APIs, or other content that lives outside your project repository.
You can add up to 10 context repositories per automation. For each GitHub repository, install the Mintlify GitHub App. Add repositories on the [GitHub App settings](https://app.mintlify.com/settings/organization/github-app) page.
### Integrations [#integrations]
For custom automations and supported predefined automations, enable connected [integrations](/automations/integrations). The agent pulls context from shared tools like Notion, Jira, or Linear when the automation runs.
To enable integrations for an automation, open its configure page, expand **Advanced options**, and select the integrations you want to use in **Integrations**.
If you select **Integration** as the trigger for a custom automation, the triggering integration is always a tool for that automation. See [Integrations](/automations/integrations) for connection scopes, supported events, and permissions.
### Slack notifications [#slack-notifications]
Send Slack messages to one or more channels when automations run.
To enable Slack notifications:
1. Install the [Mintlify Slack app](/agent/slack) in your workspace.
2. Click **Configure Slack** on the [Automations](https://app.mintlify.com/products/automations) page of your dashboard.
3. Select one or more channels to send notifications to.
4. Click **Save changes**.
Once enabled, Mintlify posts to the selected channels when:
* An automation opens a pull request for review.
* An automation pull request has been waiting for review for three days.
* An automation merges a pull request, or fails to complete.
### Email notifications [#email-notifications]
To receive an email when an automation run succeeds or fails, turn on automation run emails from the [Notifications](/dashboard/notifications) page of your dashboard.
### Instructions [#instructions]
Add optional instructions in the **Scope** section of the configure page. For predefined automations, this field appears as **Additional prompts** and appends to the automation's base prompt on every run. For custom automations, this field appears as **Prompt** and is the automation's entire set of instructions. Use it to adjust the style, tone, or other project-specific behaviors without changing the core automation logic.
### Target languages [#target-languages]
When you enable the **Translate content** automation, select one or more languages to keep in sync with your source content.
* Mintlify reads the [languages](/organize/navigation#languages) defined in your `docs.json` to identify your default language and preselects any already configured target languages.
* You must select at least one target language to save the automation.
* You cannot select the source language as a target.
You can add target languages at any time by opening the automation's configure page and editing the **Translate to** field.
## GitLab setup [#gitlab-setup]
To use GitLab repositories in an automation, connect each project through the [GitLab OAuth](https://app.mintlify.com/settings/organization/gitlab-oauth) settings page. Connect every repository the automation touches—your documentation repository and any trigger or context repositories. You must have at least the Maintainer role on each project.
Automations require a paid GitLab tier. The agent uses short-lived project access tokens for repository access, which GitLab's Free plan does not support.
## Disable an automation [#disable-an-automation]
1. Open the [Automations](https://app.mintlify.com/products/automations) page in your dashboard.
2. Click the toggle beside an automation to disable it.
When you re-enable a scheduled automation or change its schedule, Mintlify recalculates the next run time from the current time. Disabled automations do not retain a pending run time.
## Delete an automation [#delete-an-automation]
1. Open the [Automations](https://app.mintlify.com/products/automations) page in your dashboard.
2. Click the settings button on the custom automation's card to open its configure page.
3. Click **Delete automation** at the bottom of the page and confirm.
To delete any automation from the terminal, use [`mint automations`](/cli/commands#mint-automations). Deletion is permanent and cannot be undone.
## Run an automation manually [#run-an-automation-manually]
You can trigger an automation on demand without waiting for its next scheduled or event-based run.
1. Open the [Automations](https://app.mintlify.com/products/automations) page in your dashboard.
2. Click the settings button on the automation's card to open its configure page.
3. Click the run button (**Test run** or **Run now**, depending on the automation).
4. Select the run scope.
* **Since a date**: Reviews changes from the selected date through the current time. The date defaults to the automation's last run, or seven days ago if it has never run.
* **Everything**: Reviews the entire site or repository history. This scope usually takes longer than a targeted run.
* **Specific pull request**: Limits the run to one pull request in a selected repository.
5. Click **Run now**.
Manual runs save the automation's current configuration and activate the automation before starting. They count toward your credit usage and appear in the run history alongside automatically triggered runs.
You can manually run automations with schedule, content update, or code change triggers. Integration-triggered and webhook-triggered automations run only when their trigger fires, so their run button is unavailable. The **Translate content** automation can always run manually.
## Trigger a scheduled automation via API [#trigger-a-scheduled-automation-via-api]
For automations with a **Custom schedule** trigger, you can start a run from your own tooling instead of waiting for the next scheduled time. Use the [Trigger automation](/api/automations/trigger) endpoint to fire a run from a CI/CD pipeline, release script, or any service that can make an authenticated HTTP request.
API-triggered runs behave exactly like scheduled runs: they pick up everything that has changed since the last completed run, count toward credit usage, and appear in the run history.
## Trigger a webhook automation [#trigger-a-webhook-automation]
Custom automations with a **Webhook** trigger run when an authenticated `POST` request arrives at their webhook endpoint. After you save the automation, open its configure page to copy the webhook URL and view the `Authorization: Bearer ` header template. Replace `` with an unexpired organization API key with write access, created on the [API keys](https://app.mintlify.com/settings/organization/api-keys) page. Automations do not create, store, or rotate keys.
Runs triggered through the webhook use the automation's saved prompt, read the full repository history, and appear in the run history labeled **Webhook request**. See [Trigger automation webhook](/api/automations/webhook) for the request format, response codes, and rate limits.
## View run history [#view-run-history]
The [Runs](https://app.mintlify.com/products/automations?tab=runs) tab on the automations page displays a list of all runs for all automations.
A run is one execution of an automation. A run can create a new pull request, update an existing pull request, fail to run, or find nothing to change.
1. Open the [Automations](https://app.mintlify.com/products/automations?tab=runs) page in your dashboard.
2. Use the dropdown menus to filter by specific automations or status.
Each result shows one of the following statuses:
* **Review needed**: The agent finished the run, but someone on your team must review and merge the changes.
* **Running**: The agent is actively working on the automation job.
* **Accepted**: The agent finished the run and the changes merged into your repository.
* **Closed**: The agent finished the run, but someone rejected the changes.
* **Failed**: The agent could not complete the run.
* **No action needed**: The agent finished the run but did not find anything to update.
* **Modified PR**: The result appended changes to a pull request opened by an earlier run.
You can act on results directly from the list. For runs awaiting review, click **Accept** to merge the changes or **Preview** to open the [preview deployment](/deploy/preview-deployments) for the run's branch. To open the run's branch in the editor instead, click **View changes**, or click then **Open in editor**. For failed results, click **Re-trigger** to start the run again.
The **Preview** button only appears when the run has a linked preview deployment. Preview deployments expire after a period of inactivity. Once expired, the button shows **Preview expired** and no longer works.
### Resolve merge conflicts [#resolve-merge-conflicts]
If a run's pull request conflicts with your deploy branch, the agent prompts you to resolve the conflicts when you click **Accept** for an automation run.
Click **Resolve and merge** to have the agent merge the latest deploy branch changes into the pull request branch, resolve the conflicts, and merge the pull request automatically. If the agent can't resolve the conflicts, resolve them manually in your repository, then click **Accept**.
To see a run's prompt, the files it read or changed, and any pull requests, click the run's actions menu then click **View run details**.
## Continue a run in the editor [#continue-a-run-in-the-editor]
After an automation completes and creates changes on a branch, you can open those changes directly in the editor to review, refine, or publish them.
1. Open the [Automations](https://app.mintlify.com/products/automations) page in your dashboard.
2. On the **Runs** tab, click **View changes** on the run, or open the actions menu and click **Open in editor**. Both options are only available while the run's pull request is still open.
The editor opens on the automation's branch. Ask the editor agent to refine or extend the work. The agent has full context on the automation's prompt, a summary of the changes, and which pages the automation modified, so you don't need to re-explain the background.
If the automation can run with default settings, it activates immediately. Otherwise, the automation's configure page opens so you can fill in any required configurations.
3. If the configure page opens, fill in the required fields and click **Save**.
To change settings for an active automation, click the settings button on its card to open its configure page. Use the toggle in the page header to enable or disable the automation, and click **Save** to apply your changes.
## Configurations [#configurations]
Each automation's configure page groups settings into **Trigger**, **Scope**, and **Advanced options** sections.
### Trigger [#trigger]
Each automation has a default trigger that controls when it runs. To change the trigger, select a different trigger type on the automation's configure page.
* **Content update**: Runs whenever you push content to your project repository, including pull request merges and direct pushes.
* **Code change**: Runs when a pull request merges in a connected source code repository. You must specify at least one source repository. Click **Add repo** to trigger on pull requests from more than one repository. For each repository, you can optionally set **Exclude author** to ignore pull requests from a specific author, and **Listening to changes in** to only trigger on pull requests with changes under a specific path.
* **Custom schedule**: Runs on a recurring schedule you define. Pick a preset (Daily, Every Monday, Every Friday, or Twice weekly) and a start hour, or select **Custom cron** and enter a standard 5-field cron expression (`minute hour day month weekday`). Automations queue within 10 minutes of the scheduled time.
* **Integration**: Runs when a selected event occurs in a connected shared integration or when a new message posts to a selected Slack channel. Available for custom automations. Select the integration and event, then complete any additional event fields that appear. For Slack triggers, pick one or more channels that you have added the [Mintlify Slack app](/agent/slack) to.
* **Webhook**: Runs when an authenticated `POST` request hits the automation's webhook endpoint. Available for custom automations only. Save the automation first; the trigger card then shows the webhook URL and a **Copy auth header** action for the `Authorization: Bearer ` header. Supply an unexpired organization API key with write access from the [API keys](https://app.mintlify.com/settings/organization/api-keys) page. Use this to trigger a run from a CI/CD pipeline, release script, or internal tool. See [Trigger automation webhook](/api/automations/webhook) for the endpoint and rate limits.
#### Filter code change triggers [#filter-code-change-triggers]
For automations with a **Code change** trigger on GitHub, each source repository appears in its own card on the configure page. You can add up to 50 repositories per automation. Under **Show advanced options** on each card, you can narrow when the automation runs for that repository:
* **Listening to changes in**: Add paths that the pull request must touch for the automation to run. Paths can be files, folders, or glob patterns (for example, `docs/**/*.mdx`). Suggestions come from the repository's tracked files. You can also type a custom path.
* **Excluding PRs from**: Add GitHub usernames or bot accounts whose pull requests should not trigger the automation. Useful for skipping merges from automation accounts. Suggestions come from recent contributors. You can also type a username.
Each repository supports up to 20 paths and 20 excluded authors. Changing the repository for an automation clears its filters.
### Update mode [#update-mode]
Each automation has a default mode for how it makes updates: either directly merging changes into your content repository, or opening a pull request for review.
Select the mode in the **After automation runs** section of the automation's configure page. Select **Update and merge changes** to merge changes automatically. Select **Modify and wait for review** to require a review before changes go live.
For GitHub repositories, automatic updates require the Mintlify GitHub App to have bypass permissions on every ruleset targeting your deploy branch, including organization-level and repository-level rulesets. See [Configure automerge](/guides/configure-automerge) for setup instructions.
For GitLab repositories, automerge uses the GitLab OAuth connection and requires at least the Maintainer role on each project.
### Context repositories [#context-repositories]
For custom automations and some predefined automations, you can add context repositories. Context repositories are additional source code repositories the agent reads when the automation runs. This is useful when your automation prompt references code, APIs, or other content that lives outside your project repository.
You can add up to 10 context repositories per automation. For each GitHub repository, install the Mintlify GitHub App. Add repositories on the [GitHub App settings](https://app.mintlify.com/settings/organization/github-app) page.
### Integrations [#integrations]
For custom automations and supported predefined automations, enable connected [integrations](/automations/integrations). The agent pulls context from shared tools like Notion, Jira, or Linear when the automation runs.
To enable integrations for an automation, open its configure page, expand **Advanced options**, and select the integrations you want to use in **Integrations**.
If you select **Integration** as the trigger for a custom automation, the triggering integration is always a tool for that automation. See [Integrations](/automations/integrations) for connection scopes, supported events, and permissions.
### Slack notifications [#slack-notifications]
Send Slack messages to one or more channels when automations run.
To enable Slack notifications:
1. Install the [Mintlify Slack app](/agent/slack) in your workspace.
2. Click **Configure Slack** on the [Automations](https://app.mintlify.com/products/automations) page of your dashboard.
3. Select one or more channels to send notifications to.
4. Click **Save changes**.
Once enabled, Mintlify posts to the selected channels when:
* An automation opens a pull request for review.
* An automation pull request has been waiting for review for three days.
* An automation merges a pull request, or fails to complete.
### Email notifications [#email-notifications]
To receive an email when an automation run succeeds or fails, turn on automation run emails from the [Notifications](/dashboard/notifications) page of your dashboard.
### Instructions [#instructions]
Add optional instructions in the **Scope** section of the configure page. For predefined automations, this field appears as **Additional prompts** and appends to the automation's base prompt on every run. For custom automations, this field appears as **Prompt** and is the automation's entire set of instructions. Use it to adjust the style, tone, or other project-specific behaviors without changing the core automation logic.
### Target languages [#target-languages]
When you enable the **Translate content** automation, select one or more languages to keep in sync with your source content.
* Mintlify reads the [languages](/organize/navigation#languages) defined in your `docs.json` to identify your default language and preselects any already configured target languages.
* You must select at least one target language to save the automation.
* You cannot select the source language as a target.
You can add target languages at any time by opening the automation's configure page and editing the **Translate to** field.
## GitLab setup [#gitlab-setup]
To use GitLab repositories in an automation, connect each project through the [GitLab OAuth](https://app.mintlify.com/settings/organization/gitlab-oauth) settings page. Connect every repository the automation touches—your documentation repository and any trigger or context repositories. You must have at least the Maintainer role on each project.
Automations require a paid GitLab tier. The agent uses short-lived project access tokens for repository access, which GitLab's Free plan does not support.
## Disable an automation [#disable-an-automation]
1. Open the [Automations](https://app.mintlify.com/products/automations) page in your dashboard.
2. Click the toggle beside an automation to disable it.
When you re-enable a scheduled automation or change its schedule, Mintlify recalculates the next run time from the current time. Disabled automations do not retain a pending run time.
## Delete an automation [#delete-an-automation]
1. Open the [Automations](https://app.mintlify.com/products/automations) page in your dashboard.
2. Click the settings button on the custom automation's card to open its configure page.
3. Click **Delete automation** at the bottom of the page and confirm.
To delete any automation from the terminal, use [`mint automations`](/cli/commands#mint-automations). Deletion is permanent and cannot be undone.
## Run an automation manually [#run-an-automation-manually]
You can trigger an automation on demand without waiting for its next scheduled or event-based run.
1. Open the [Automations](https://app.mintlify.com/products/automations) page in your dashboard.
2. Click the settings button on the automation's card to open its configure page.
3. Click the run button (**Test run** or **Run now**, depending on the automation).
4. Select the run scope.
* **Since a date**: Reviews changes from the selected date through the current time. The date defaults to the automation's last run, or seven days ago if it has never run.
* **Everything**: Reviews the entire site or repository history. This scope usually takes longer than a targeted run.
* **Specific pull request**: Limits the run to one pull request in a selected repository.
5. Click **Run now**.
Manual runs save the automation's current configuration and activate the automation before starting. They count toward your credit usage and appear in the run history alongside automatically triggered runs.
You can manually run automations with schedule, content update, or code change triggers. Integration-triggered and webhook-triggered automations run only when their trigger fires, so their run button is unavailable. The **Translate content** automation can always run manually.
## Trigger a scheduled automation via API [#trigger-a-scheduled-automation-via-api]
For automations with a **Custom schedule** trigger, you can start a run from your own tooling instead of waiting for the next scheduled time. Use the [Trigger automation](/api/automations/trigger) endpoint to fire a run from a CI/CD pipeline, release script, or any service that can make an authenticated HTTP request.
API-triggered runs behave exactly like scheduled runs: they pick up everything that has changed since the last completed run, count toward credit usage, and appear in the run history.
## Trigger a webhook automation [#trigger-a-webhook-automation]
Custom automations with a **Webhook** trigger run when an authenticated `POST` request arrives at their webhook endpoint. After you save the automation, open its configure page to copy the webhook URL and view the `Authorization: Bearer ` header template. Replace `` with an unexpired organization API key with write access, created on the [API keys](https://app.mintlify.com/settings/organization/api-keys) page. Automations do not create, store, or rotate keys.
Runs triggered through the webhook use the automation's saved prompt, read the full repository history, and appear in the run history labeled **Webhook request**. See [Trigger automation webhook](/api/automations/webhook) for the request format, response codes, and rate limits.
## View run history [#view-run-history]
The [Runs](https://app.mintlify.com/products/automations?tab=runs) tab on the automations page displays a list of all runs for all automations.
A run is one execution of an automation. A run can create a new pull request, update an existing pull request, fail to run, or find nothing to change.
1. Open the [Automations](https://app.mintlify.com/products/automations?tab=runs) page in your dashboard.
2. Use the dropdown menus to filter by specific automations or status.
Each result shows one of the following statuses:
* **Review needed**: The agent finished the run, but someone on your team must review and merge the changes.
* **Running**: The agent is actively working on the automation job.
* **Accepted**: The agent finished the run and the changes merged into your repository.
* **Closed**: The agent finished the run, but someone rejected the changes.
* **Failed**: The agent could not complete the run.
* **No action needed**: The agent finished the run but did not find anything to update.
* **Modified PR**: The result appended changes to a pull request opened by an earlier run.
You can act on results directly from the list. For runs awaiting review, click **Accept** to merge the changes or **Preview** to open the [preview deployment](/deploy/preview-deployments) for the run's branch. To open the run's branch in the editor instead, click **View changes**, or click then **Open in editor**. For failed results, click **Re-trigger** to start the run again.
The **Preview** button only appears when the run has a linked preview deployment. Preview deployments expire after a period of inactivity. Once expired, the button shows **Preview expired** and no longer works.
### Resolve merge conflicts [#resolve-merge-conflicts]
If a run's pull request conflicts with your deploy branch, the agent prompts you to resolve the conflicts when you click **Accept** for an automation run.
Click **Resolve and merge** to have the agent merge the latest deploy branch changes into the pull request branch, resolve the conflicts, and merge the pull request automatically. If the agent can't resolve the conflicts, resolve them manually in your repository, then click **Accept**.
To see a run's prompt, the files it read or changed, and any pull requests, click the run's actions menu then click **View run details**.
## Continue a run in the editor [#continue-a-run-in-the-editor]
After an automation completes and creates changes on a branch, you can open those changes directly in the editor to review, refine, or publish them.
1. Open the [Automations](https://app.mintlify.com/products/automations) page in your dashboard.
2. On the **Runs** tab, click **View changes** on the run, or open the actions menu and click **Open in editor**. Both options are only available while the run's pull request is still open.
The editor opens on the automation's branch. Ask the editor agent to refine or extend the work. The agent has full context on the automation's prompt, a summary of the changes, and which pages the automation modified, so you don't need to re-explain the background.